Kumihimo, the ancient Japanese art of braiding, transforms simple threads into stunning cords perfect for jewelry, accessories, and decorative projects. While traditional methods use wooden stands, modern crafters can achieve beautiful results with a simple foam disk. This beginner-friendly guide walks you through the entire process—from setting up your threads to finishing your first braid.
What You’ll Need
Before you begin, gather these supplies:
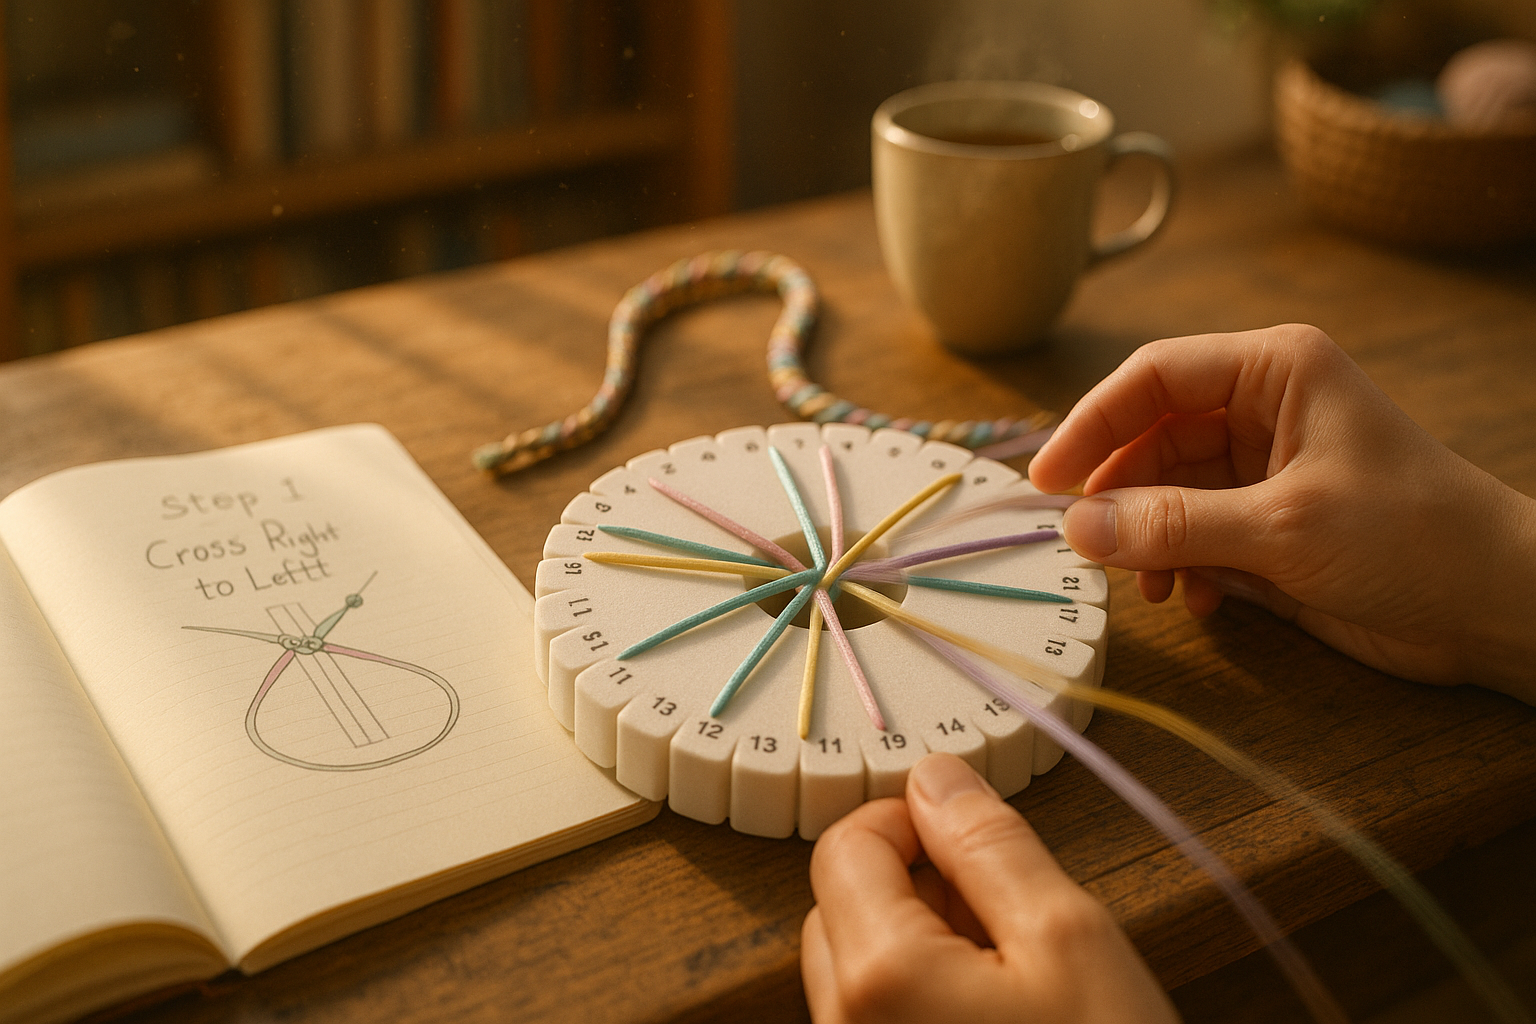
Kumihimo disk (round foam with 32 slots)
8 strands of embroidery floss, satin cord, or yarn (24–30 inches long)
Scissors
Clasp or closure (optional)
Small weight (a charm or washer helps maintain tension)
Step 1: Preparing Your Threads
Cut your threads: Measure and cut eight equal-length strands (24–30 inches is ideal for a bracelet).
Secure the ends: Tie all strands together with a tight overhand knot, leaving a 1-inch tail.
Anchor the knot: Thread the tail through the disk’s center hole from the top, letting the knot rest underneath. This keeps your work stable.
Pro Tip: For color patterns, arrange strands symmetrically (e.g., alternate colors or group them in pairs).
Step 2: Setting Up the Disk
Divide your eight strands into four pairs.
Place each pair into the four cardinal slots:
Note: The disk’s numbered slots help track your progress, but you can work without them once you’re comfortable.
Step 3: The Basic Braiding Technique
Kumihimo relies on a simple, repetitive motion:
Move the right North strand:
Move the left South strand:
Rotate the disk: Turn it counter-clockwise so the next pair moves to the top.
Repeat the sequence: Continue the same steps with the new top pair.
Visual Cue: Your hands will form a "cross" motion—right top to left bottom, left bottom to right top.
Step 4: Maintaining Consistency
Tension: Gently pull downward as you braid to keep the cords snug (but not too tight).
Speed: Start slowly; speed will come with practice.
Check your work: The braid should form a smooth spiral below the disk.
Troubleshooting:
If the braid looks uneven, check that you’re rotating the disk the same direction each time.
If threads tangle, pause and straighten them.
Step 5: Finishing Your Braid
Measure the length: Stop when the braid reaches your desired size (e.g., 7 inches for a bracelet).
Secure the end: Tie another overhand knot at the bottom.
Add a clasp (optional):
Creative Variations to Try
Once you’ve mastered the basic 8-strand braid, experiment with:
Beaded kumihimo: String seed beads onto threads before braiding.
Color patterns: Alternate thread colors for stripes or chevrons.
Flat braids: Use a square plate instead of a round disk.
Why Kumihimo?
Relaxing: The repetitive motion is meditative.
Versatile: Make bracelets, keychains, or even shoelaces.
Budget-friendly: Supplies cost under $10 to start.
Final Thoughts
Kumihimo is an easy, rewarding craft that yields stunning results. With just a foam disk and some threads, you can create professional-looking braids in minutes. Ready to try it? Share your first creation with us—we’d love to see it!


Comments
Post a Comment